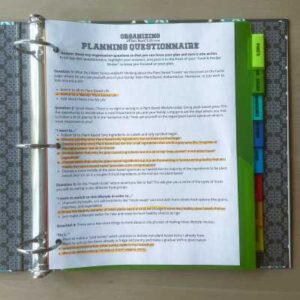
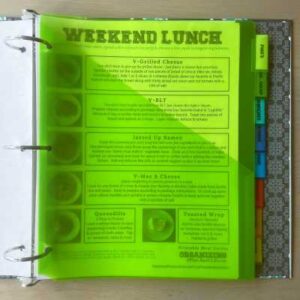
Plant Based Recipe Binder

Organize Your Plant Based Recipes with a Plant Based Recipe Binder

Let's Create a Plant Based Recipe Binder So You Can Always Find What You Are Looking For

DO YOU HAVE RECIPES SCATTERED EVERYWHERE? 

You’re making great strides in adopting your Plant Based lifestyle! Now, let’s talk about keeping your new recipes organized in a way that’s simple and easy to manage. Our guide for creating your Plant Based Recipe Binder is here to help you stay organized and prepared. In just a few straightforward steps, you’ll be on your way to creating your own personalized plant based recipe binder that suits your needs perfectly.

Completed Plant Based Binder
Refile in Binder After Recipe Is Prepared

BEFORE YOU START

This guide goes deep into the specifics of how to create and maintain your plant based recipe binder.  Take a few minutes to skim the process and get the necessary tools.  Then set aside an hour to tackle the project in full.  Once you do, you’ll never look back!

Binder Icons 1

ORDER SUPPLIES

Start by taking stock of the supplies needed to create your Plant Based Binder.  We list the items below and have included some links to our Walmart Storefront with particular ones we like best so that you can easily get everything you need.  You can absolutely deviate from these recommendations, use whatever works best for you!

Find the FULL PLANT BASED RECIPE BINDER COLLECTION HERE!

Please note, this page contains affiliate links to our curated WALMART STOREFRONT and we may receive a very small commission for each item sold to help with the upkeep of this website.  Please be assured you will never pay more to purchase any of these items.

•3-Ring Binder – 1½ to 2 Inch:  Your Choice – find one that is the essence of you and your journey. Here is a simple 3-RING BINDER one from Walmart.com but anyone will do.

•Highlighter:  Pick your favorite colors and keep them on hand to mark your recipes as you use them.  This will subtly remind you to add some variety to your food rotation. Here is a simple & reasonably priced ASSORTED HIGHLIGHTER SET from Walmart.com.

Plant Based Binder & Highlighters

•3-Ring Dividers:  Any 8 Tab Divider will work.  We recommend the Avery Plastic Pocket Insertable Divider #11903.  We like the durability of the plastic divider and the ability to insert sheets of paper into the pockets.  This allows you to place recipes that you “want to try” into the divider folder and then if you love them, 3-hole punch and add them to the binder.

Try these AVERY BIG TAB PLASTIC DIVIDERS from Walmart.com

Avery 3 Ring Binder Dividers

•Page Size Sheet Protectors:  The key to this item is to purchase the “Page Size” protectors.  This smaller footprint allows the binder tabs to extend beyond the recipe for easy management.

Try these PAGE SIZE SHEET PROTECTORS from Walmart.com

Page Size Sheet Protectors

•3-Hole Punch:  A simple desktop 3-hole punch, so that you can simply add your binder holes to your recipe and file in the binder in seconds.

Try this 3-HOLE PUNCH from Walmart.com

•Printer Paper:  Always good to have on hand for when you find a recipe online.  Whether you print from our EASY PLANT BASED RECIPES collection or another great plant based website.  Pro Tip: when going to other websites always choose the “print on both sides” selection for your printer – and try to keep it to only one page (both sides) so that it fits easily in your binder.  Our website simplifies our recipes to print on one side of a page only so check them out!

Try this PRINTER PAPER from Walmart.com

3 Hole Punch and Printer Paper
Binder Icons 2

CREATE YOUR DIVIDER TABS

We have simplified the process of creating binder tabs into two options:

If you are just getting started and want to create a basic binder then choose Option 1 – Easy Pre-Selected Tabs for the quickest route possible.

If you would like to have tabs with:
•Unique or specific names
•More tabs to further sort into more categories
•Or a choice of more fonts and sizes
Then skip down to Option 2 – Create a free Avery Account where you can tailor your tabs to all those choices.  It might take a little longer, but it does add a lot of personalization to your project.  We show you how to do this step by step!

OPTION 1 – EASY PRE-SELECTED TABS

Print the PRE-SELECTED TEMPLATE TABS from the PDF we have created (please note that this template corresponds to “Big Tab” labels).

Tabs in the whimsical “Luckiest Guy” font (size 15):
•PMG’s
•Veggie & Salad
•Sandwiches
•Entrees
•Soup
•Breakfast
•Appetizer
•Dessert

Plant Based Binder Big Tab Label Template JPG

OPTION 2 – CUSTOM DIY TABS

Create a free account on AVERY.COM to customize the tabs to your specific tastes.  Pick the names of the tabs you want and the fonts you love.

• Create a free Avery.com account.
• Choose Template:  Enter your chosen template number then “Select this Template.”
• Choose Design:  Highlight the “blank” template then “Select this Design.”
• Select Options:  “Number of Sets to Create – 1” (this is a standard set of 8 tabs, choose 2 if you are making more than 8 tabs) & “Start on Set – 1” & Collate (123…123…123).  Then select “Next.”
• No need to do anything with the “Image” selections unless you are adding an image.
• Enter your custom tab names and click “Finish.”
• With “Edit All” selected on the far right side, highlight the words and select your preferred font and font size.
• You may have to change to “Edit One” if you need to resize a particular tab or change the margins slightly.
• When they look good, select “Preview & Print,” double check they all look good on the preview, and select “Get PDF to Print.”

Avery Free Account Creation
Avery Template Screenshot

Tips IconTIP:  We recommend FIRST printing on a plain sheet of paper to confirm everything looks good with the wording and the alignment before printing on the actual tab sheet (that comes with the labels).  Once everything looks good, THEN print on the sheet, carefully remove the perforations, and slide them into the corresponding dividers.

Binder Icons 3

SET UP THE BINDER

NOW IT’S TIME TO CUSTOMIZE YOUR BINDER

• Add the dividers to the binder.

• Explore your PLANT BASED ROADMAP options and complete the questionnaire. Then 3 hole punch, slide into a sheet protector, and add to the binder, on top of the dividers.  Remember, you are doing this so you can refer back to the plant based path that works for you.  This helps as you navigate choosing what types of foods to eat or eliminate.

Add Tabs To Binder
Add Planning Questionnaire
Binder Icons 4

PRINT & INSERT THE "PRINTABLE MEAL GUIDES" (PMG'S)

Jump to the BEGINNER PLANT BASED FOODS page for the entire collection of printable guides print and insert into the binder.

ADD THE PRINTABLE GUIDES TO THE BINDER

•If you chose the “Easy Premade Tabs” above, then you will file the PMGs in the first tab.
•You could also file each PMG under the tab for that category, for example, “Weekday Breakfast” PMG under the “Breakfast” tab, and “Salads & Slaws” PMG under the “Veg & Salad” tab, etc.

There is no right or wrong with this, it is just a preferential thing!

Add PMGs to Binder
Binder Icons 5

RECIPE MANAGEMENT

Now we are going to look at recipe management for the rest of the binder and start filling in recipes that you may already have on hand.  Don’t be afraid to TRY new ingredients and spices – BE OPEN-MINDED!

FIND 10 RECIPES TO GET STARTED

Here are some resources to start with:

  1. Look through some of your own favorite recipes that may be adaptable to plant based by substituting a non-dairy item or eliminating a meat item.
  2. Look at our EASY PLANT BASED RECIPES page to find simplified recipes (both in the difficulty of ingredients & procedure) that are easy to follow and limited to only one page.
  3. Search “plant based recipes” or “vegan recipes” to find some online recipes.
  4. Another way is via a Social Media outlet, which can be fun because the format is likely different from a more traditional search.  Many recipes are displayed in short clipped videos showing ingredients, quick prep steps, and the enjoyable end result.  You can check out TikTok, Instagram, and Pinterest to see these but just beware that there is a lot of variation in the quality of these outcomes and there can be some less satisfaction than more traditional methods.

Tips IconTIP:  While it may be fun to read all about the recipe’s inspiration and creation it can be VERY time-consuming and overwhelming (this is there for online search optimization).  Once you get a feel for the layout of some of these pages, always just click “JUMP TO RECIPE” to get to the nitty-gritty.  Look at the ingredients to get a feel for the flavors and difficulty before deciding to choose them.

PRINT THE RECIPES

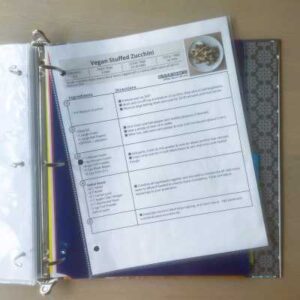
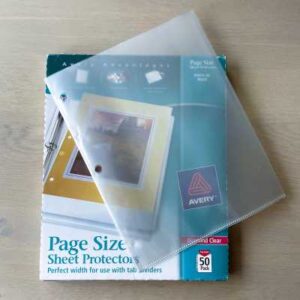
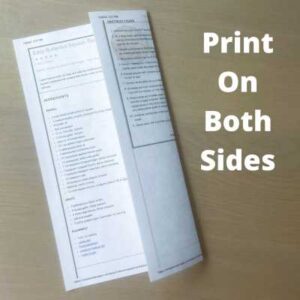
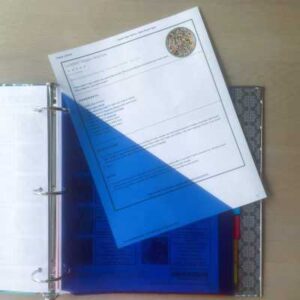
Printing is an important part of this process because we house these printed recipes in “sheet protectors” within the binder for easy access.  Ideally, you want them to print on one side of one sheet of paper as we discuss on our EASY PLANT BASED RECIPES page.  However, both sides of a single sheet of paper can work, too.  Here is what to look for:

As you click “Print” look at the dialog box that comes up to see how many pages it will print on…

•ONE side is ideal, just print regularly.
•If TWO SIDES – then make sure you select “Print on Both Sides (flip on long edge)” OR manually print each side separately.
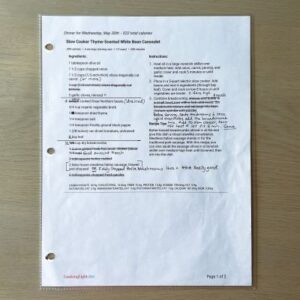
•If THREE OR MORE SIDES – look at what is contained on the 3rd page.  In many cases, it may be insignificant notes or other information that you don’t need to print.  If that is the case, just print pages 1 & 2 on both sides as above. If more pages are needed, print them and staple all the pages together (this isn’t the end of the world, you will just need to remove the whole recipe from the sheet protector when you are using it in the kitchen).

2 Page Recipe Printed Both Sides

FILE THE RECIPES

If this is a recipe you already know you will LOVE:
•3-hole punch it.
•Insert in a page-size sheet protector.
•File under the corresponding food category within the dividers.

If this is a recipe that you want to just try first:
•Don’t punch or sheet protector it, simply place in the FOLDER of the corresponding “food category divider” OR place it in the TOP FOLDER of the binder (the PMG tabbed divider).
•If a recipe you tried has potential but you want to change things a bit, make notes directly on the recipe and file them back in that folder of the corresponding food category divider, so you can try these changes next time.
Always look at these recipes first while you are meal planning so that you can remember to add them to the rotation.
•THEN, if you didn’t love it – just toss it away.  But, if you do love it and want to make it again, file it away with a sheet protector as we mentioned above.  Always keep these papers moving within your book so that it doesn’t get filled with a stagnant mess.

Recipe to Try
Binder Icons 6

MAINTAIN YOUR SYSTEM

Once the binder is set up, you just need to take A LITTLE TIME TO KEEP IT ORGANIZED.  Here are some tips:

As you are meal planning for the week:

•Remove the recipes from the binder.
•Add the necessary items to your grocery list.
•Create the recipe.
•Then place it back into the binder AT THE BACK OF THE FOOD CATEGORY DIVIDER for future meal rotation selection.  This means that the recipe you made most recently is at the back of that category, so when you choose meals start at the front of the category so you don’t get stuck eating the same things all the time.

Refile in Binder After Recipe Is Prepared

As you are preparing the meal:

•Keep the recipe in the sheet protector to keep it clean.  If you do get a spill on it you can simply wipe it off.
•If you want to write some notes on the recipe – do it!  Just remove it from the sheet protector and replace it when you are done.  These personal notes are really helpful!

Make Notes on Recipes

As you are finding new recipes:

•Add them to the folders in your book IMMEDIATELY, otherwise you will be stuck sorting through all those papers while you are meal planning.  This adds unnecessary time to that task and may make you less likely to incorporate those new recipe ideas.
•After a while you may find certain sections, like “Entrees” are filling up quickly and you would like to further separate them by food genre.  We found adding subsection tabs like Italian, Mexican, Asian, & Indian helped keep us a little more organized the more we used the binder.

Completed Plant Based Binder