How many times have you opened your fridge, looked inside, and promptly closed it because you couldn’t find what you were looking for, let alone find those healthier plant based items to choose from? We help you step by step through the entire process to organize your refrigerator so you can start to make those Plant Based choices second nature. There are a great many ways to organize your refrigerator, not one is perfect for every situation, so we lay out an easy-to-follow guideline and show you some options to make it perfect for YOU. What are you waiting for, check it out and organize that fridge!
Organize Your Refrigerator into a Plant Based Space to Make Your New Eating Habits Even Easier
Let's Organize Your Refrigerator!

TAKE A LOOK & DECIDE WHAT YOU WANT TO ACCOMPLISH TO ORGANIZE YOUR REFRIGERATOR
Take a few minutes to look at your current fridge system and get a feel for what you have and how you may want to organize your refrigerator. It might be easiest to start this project before going on a power-shopping excursion, but really any time will work. You may also want to consider setting aside enough time in one sitting to complete the project. Because you are working with cold items outside of the refrigerator, you want to minimize that time and complete it all at once.
ITEMS TO CONSIDER
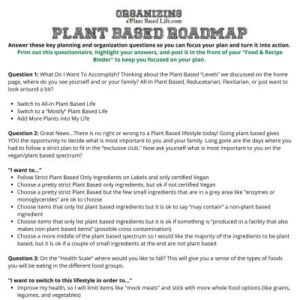
•Refer to the PLANT BASED ROADMAP PLANNING QUESTIONNAIRE and assess what changes you may want to make to achieve those goals. This will help you determine how to organize your refrigerator.
•Refer to the list of common STAPLES & ESSENTIALS you need for a plant based lifestyle.
•Determine if you need to accommodate non-plant based eaters.
•Decide what you will do with current non-plant based items (use up, donate, or set aside for non-plant based eaters in the household).

IF YOU HAVE NON-PLANT BASED EATERS TO ACCOMODATE...
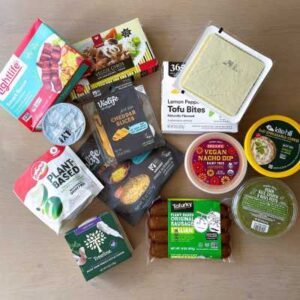
A refrigerator can be a little bit more complicated if you will be accommodating non-plant based eaters in addition to plant based ones. You will likely have two sets of the same categories of cold foods, like mayo and salad dressings, so you have to make a plan early in the organizational process.
THE MAIN QUESTION:
•Will you mix the Plant Based and non-PB together?
•Will you completely separate the two?
•Or will you do both, depending on the type of food?
All three scenarios can easily work if all the eaters understand the system and a little creativity can help!
![]() A KEY to this organization is to take a look at the refrigerator compartments like the bins and drawers that come attached to the unit. Think outside the typical “Lunchmeat” & “Produce” bins and convert those to “plant based” and “non-plant based” bins.
A KEY to this organization is to take a look at the refrigerator compartments like the bins and drawers that come attached to the unit. Think outside the typical “Lunchmeat” & “Produce” bins and convert those to “plant based” and “non-plant based” bins.
REFRIGERATOR COMPARTMENT ORGANIZATION
If you separate items like “tofu and vegan cheese” from “regular dairy cheese and bacon” you allow the plant based eaters to go directly to the food that they will eat and not be swayed or tempted by the foods they choose not to eat.


DECIDE WHAT ORGANIZATIONAL BINS YOU WILL UTILIZE
Bins and containers can be a great organizational tool in the fridge, but too many can segment your space into confusing and hard-to-maintain blocks. Here are a few ways they can really help:
•See if you can take anything out of bags and put it into small easy to see and use bins.
•Look at your snacks to see if you can put any into containers for simple access.
•Determine if you can put any categories of foods together in a larger bin to pull out easily on demand.
START WITH THESE IDEAS:
SUPER SEED CONTAINERS
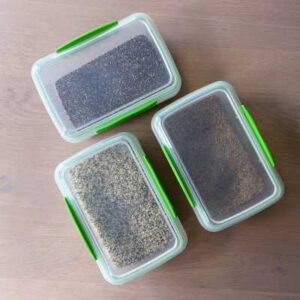
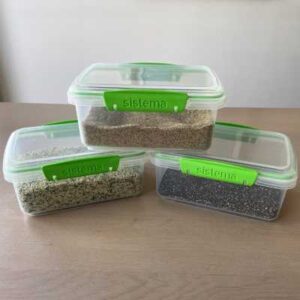
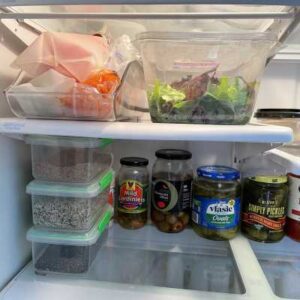
Containers with small portions of Hemp, Chia, & Flax seeds are easy to grab to add to oats, protein shakes, and salads to add a healthy perk. These SISTEMA STORAGE CONTAINERS work perfectly for these seeds.
READY TO EAT SNACK CONTAINERS
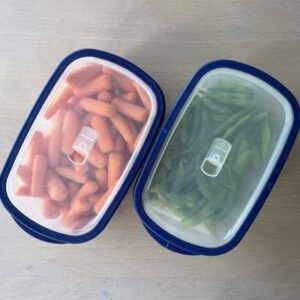
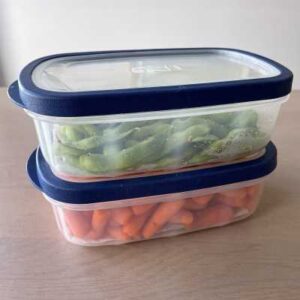
Wash & separate those “grab and snack items” like baby carrots, edamame, etc. into smaller containers so you always have something healthy to snack on. Check out these affordable FOOD STORAGE CONTAINERS to have on hand.
SALAD ORGANIZER CONTAINER
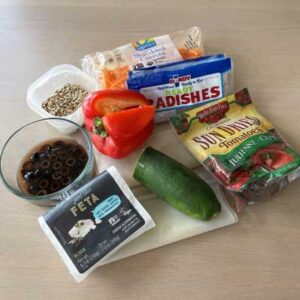
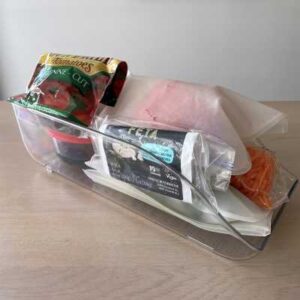
Easy to grab salad organizer that holds all of the ingredients you need to throw together a perfect salad in a snap. Jump to our SALADS & SLAWS PRINTABLE MEAL GUIDE for more information on how to assemble it. We use these SODA CAN DISPENSERS from Walmart in our refrigerator to as our go-to organizational bins.
REMOVE EVERY ITEM FROM THE FRIDGE
Remove every item from the fridge and place into basic categories for how you use the food. We recommend clearing off your kitchen table and categorizing all the items into a few main categories (then dividing them into more specific categories further down the process).
EXAMPLES OF BASIC CATEGORIES:
•Current Leftovers or Containers of Foods
•Strictly Plant Based Items (like tofu, vegan cheese, plant based “meats,” etc.)
•Non-Plant Based (if needed – items like bacon, dairy cheese, etc.)
•Commonly Shared Plant Based Items (like pickles, sauces, condiments, etc.)
•Veggies
•Fruits
As you are doing this LOOK AT EACH ITEM:
Date: If expired, toss and add replacement items to your grocery list.
If NON-plant based, decide:
•If you will USE IT UP, then create a new category “USE UP SOON.”
•If you will REPLACE IT WITH PLANT BASED then toss it or it give to a friend who will use it. Then write it on your grocery list to find a plant based option to replace it (an example of this may be something like mayo).
•If you will KEEP FOR USE BY A HOUSEHOLD NON-PLANT BASED EATER, decide if you will keep these items mixed with plant based, or keep the sections separate.
Finally, if you have a particular item lingering in the fridge and aren’t sure you will use it – move it to either the “Use Up Soon” category or toss it, don’t let it stay in there forever.

CLEAN-CLEAN-CLEAN
Now that the fridge is completely empty, chances are it will need a very thorough cleaning. Before you continue on your journey to organize your refrigerator, take a few minutes to thoroughly clean the space.
CLEANING STEPS
•Wipe down all surfaces and walls with a wet cloth and then again with a “magic eraser” to remove all the scuff marks and any lingering food particles.
•Repeat again with another wet cloth. Get into the nooks and cranny’s where spills happen, pull out any shelves to get behind or under any openings and lift any attached pressure fit mats to get between the surfaces.
•Follow that with a dry towel or paper towel to remove excess condensation.
•If you use an odor eliminator like Baking Soda, purchase a new fresh one and toss the old one.


SIZE SHELVES & RETURN THE ITEMS
You probably have an idea of how you will start to put items back. Take a look at your clean space and the different categories outside the fridge. See if you can move any shelves up or down to create a space that fits your particular items to maximize not only what you can put in, but also so that you can see everything easier as well.
Following this principle, return your remaining items. If you are having trouble with a certain area, leave it out and work with what you have. If you need to marinate on it, that is ok. You can always put it back for now and pull out the trouble areas later after you have had time to think about it.
SHELF ORGANIZATION EXAMPLES
•In the main compartment, return the containers that you created in Step 3 (Salad Organizer, Super Seed Bins, and Snack Containers) by finding a space for them and sizing the shelves to accommodate them as tightly as possible.
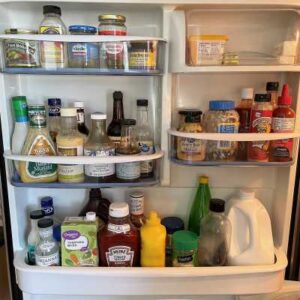
•In the door, return the condiments by category into different groups (kinds of butter, small condiments, dressings, sauces) based on the shelves available and then by the sizing of the items.

TIPS FOR FINAL ORGANIZATION & HOW TO KEEP IT UP
Great job! Look at what you have accomplished…you disposed of unused and old items, cleaned it incredibly well, and returned your items in an organized way so that you can find those Plant Based items easily. You are in the home stretch and the rest of the journey just takes time to see how you use it and what tweaks you can make to improve it. Here are some final tips to pull it all together:
PRODUCE TIPS
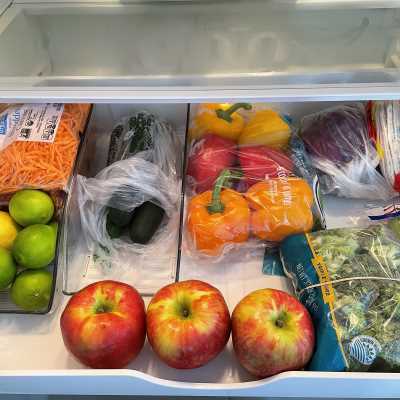
•Use rubber bands to close store bags. Even if those bags have zipper closures on them, over time food gets stuck and they begin to fail.
•Only wash certain vegetables when you bring them home, others are best to stay in their bag for freshness until you are ready to use them and then wash at that time. Our general rule is if it is in a bag, wash it before you use it. Common items to wash: apples, lemons, limes, etc. Common items to wait for: peppers, cucumbers, etc.
FINALLY…ENJOY YOUR ACCOMPLISHMENT
Now that you have taken the time to organize your refrigerator, take a minute to congratulate yourself on this huge step toward your plant based journey. Keeping these things organized in the fridge may take a little time to figure out exactly what works for you. Some final thoughts to keep things organized:
•Always keep snacks together so that you can see options at a glance. If it helps to have a whole shelf with just snacks, do it.
•Keep those leftover containers at the front and rotate in newer leftovers toward the back, so you use the oldest items first.
•Use glass containers whenever possible, especially if you are reheating in the microwave. And find storage containers that are stackable so you can make the most out of your space.

Please note, this page contains affiliate links to our curated KITCHEN STORAGE COLLECTION on our Walmart Storefront. We may receive a very small commission for each item sold to help with the upkeep of this website. Please be assured you will never pay more to purchase any of these items.
